
AI‑Assisted Software Engineering: A Step‑by‑Step Example for Developers Who Don’t Know How to Start
So, you are a professional mid- to senior-level developer (if not, this post may not be for you). You know how to write good, effective code and get work done. You hear all the hype around “vibe coding”, all the success stories about LLMs in software development, and so on.
You get a Cursor / Claude Code subscription from your employer and decide to try it out yourself. You ask the agent to implement your task by typing something like: Implement interface of repository X for working with database Y. The agent immediately starts working, and as a result you get a bunch of code that not only doesn’t work as needed, but that you can’t even remotely understand.
This was exactly my case: I made two attempts to start creating software with the help of AI, but both times I ended up with the disaster described above. As it turned out, I was simply using this new tool the wrong way. Very wrong.
The goal of this article is to help you overcome this frustration and actually start developing software with the help of AI coding agents by showing how to do it the right way. We’ll first discuss the mindset developers should have toward AI coding agents, and then take a real task and implement it step by step with the help of AI. We’ll use Cursor as a beginner-friendly IDE for AI-assisted engineering. My goal is to provide a very specific and reproducible example that you can use to kickstart your journey into building software better and faster with the help of AI.
1. New Developer Mindset
First things first: an AI coding agent is not just a new tool like an IDE or a Git UI. It’s a tool that requires a change in how you think about your workflow. You can read a lot of near-philosophical takes about it on the web, but the practical essence is the following:
You are not the developer anymore. You’re the technical lead.
The AI agent is the developer who will implement the task you’re responsible for, based on the technical specification you provide.
This is it. This is the main thing you should keep in mind all the way down the road of working with an AI coding agent. A good tech lead will never simply ask a developer “do this task” when the task is big and implies important technical decisions.
As a good technical lead, you’re responsible for:
- Investigating all technical details related to your task (the AI will help with this too!)
- Making all core technical decisions relevant to the implementation: what packages to use, which algorithm fits best, what concurrency scenarios should be taken into account, etc.
- Writing a clear technical spec that provides all the necessary implementation details and requirements the developer needs to successfully implement the task the way you want it
- Making sure the developer understood your requirements correctly
- Reviewing the developer’s code and asking to fix problems, if any
Now, let’s choose a real-world task and implement it with an AI coding agent!
2. The Task
This task is very specific to developing AI agents in Python. Don’t worry if you don’t fully understand it - the point of this article isn’t agent development in Python, but development with the help of AI agents in general. Focus on the workflow. This task is just an example; it could be any other task in any other language.
Google ADK is a Python framework for developing AI agents. This framework provides the abstract class BaseSessionService. An implementation of this abstract class can be plugged into an agent written with this framework and is responsible for storing the state of an agent session.
Out of the box, Google provides only three implementations of this class:
- An in-memory implementation for development purposes
- An implementation for storing session state in a Google Cloud service (Vertex AI)
- Another for storing information in SQL databases:
DatabaseSessionService
Our task is to implement this abstract class to store information in MongoDB. It’s a decent task for a day or two of work for a senior developer. We’ll do it in a few hours - even if the developer isn’t familiar with Google ADK at all.
3. Development Flow
Enough said. Let’s open Cursor and start working.
TL;DR: Treat the AI coding agent like a strong developer you manage, not like a magic “do the task” button. Start with a short technical investigation to understand the library and constraints, make the key technical decisions yourself, and then write a clear technical specification with examples and strict boundaries. Paste this spec to the agent in Plan mode, read the plan carefully, request fixes if something is wrong, and only then run Build. At the end, review the diff and accept changes only if the implementation matches the spec.
3.1. Environment Preparation
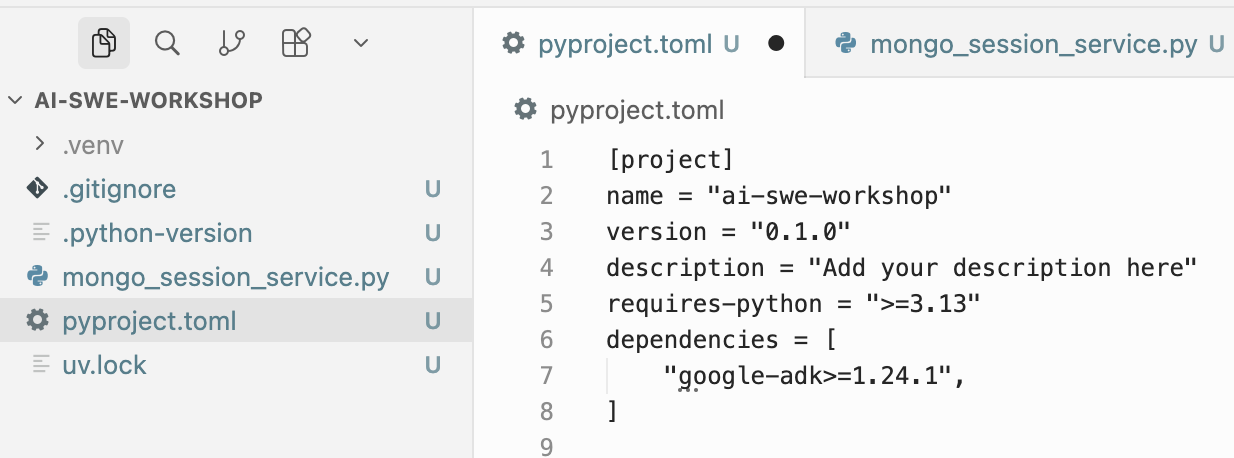
For the sake of simplicity, we’ll assume we’re starting from a clean repository that contains only:
- A dependencies file needed for our code. I’m using
uv- a Python project and environment management tool - so my dependencies file ispyproject.toml. In other languages/frameworks, it will be something different, for example, a.csprojin .NET. - An empty file for the class we aim to implement.
A real-world setup would include tests, a folder structure required for packaging this class for distribution, etc. But I want to concentrate on our goal, so we’ll leave those things aside.
Our environment is ready, and the dependency on the Google ADK package (which we’re going to extend) is added.
3.2. AI-Assisted Technical Investigation
We have a third-party library to extend (Google ADK) and another implementation of the base class (DatabaseSessionService) developed by the library vendor. A good starting point is to ask AI a few questions to understand what this library is about and how the existing implementation of the BaseSessionService abstract class works.
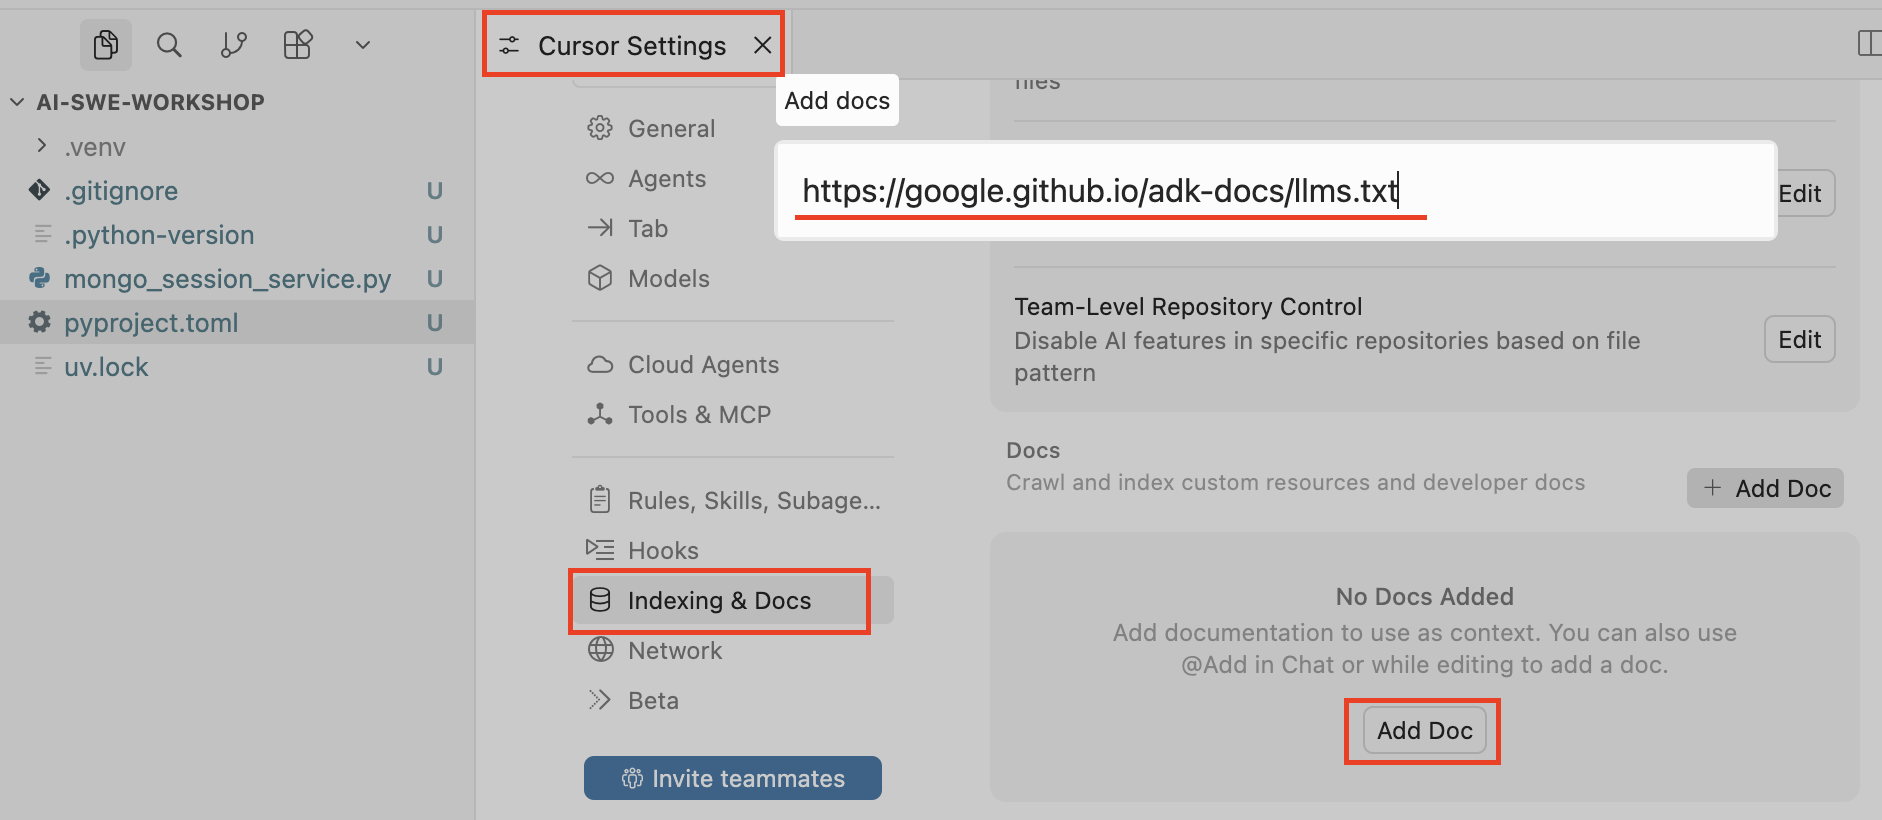
Cursor has an amazing feature that allows you to add documentation for any language/library from the web and then refer to that documentation in conversations with an agent.
We’ll take a link to the Google ADK documentation in /llms.txt format (it’s always better to use llms.txt when available) and add it to Cursor as suggested in Cursor’s documentation:
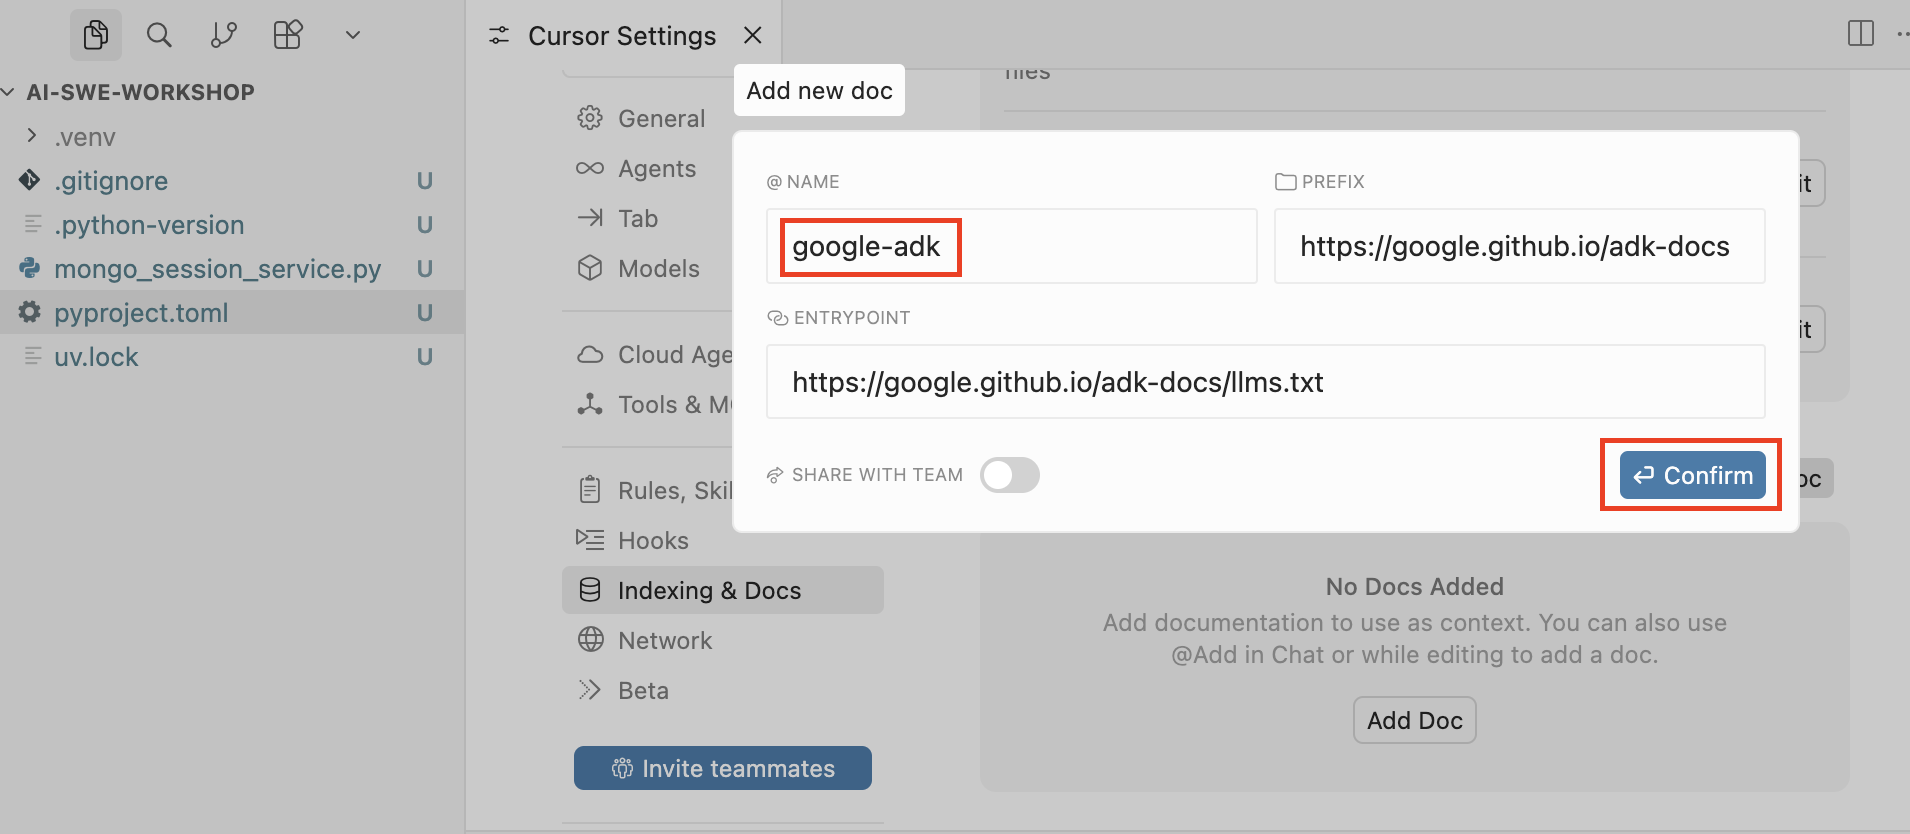
Then we specify the name that will be used to reference this documentation in conversations with agents and press Confirm:
Now we’re ready to dive into the internals of this library to better understand what needs to be done.
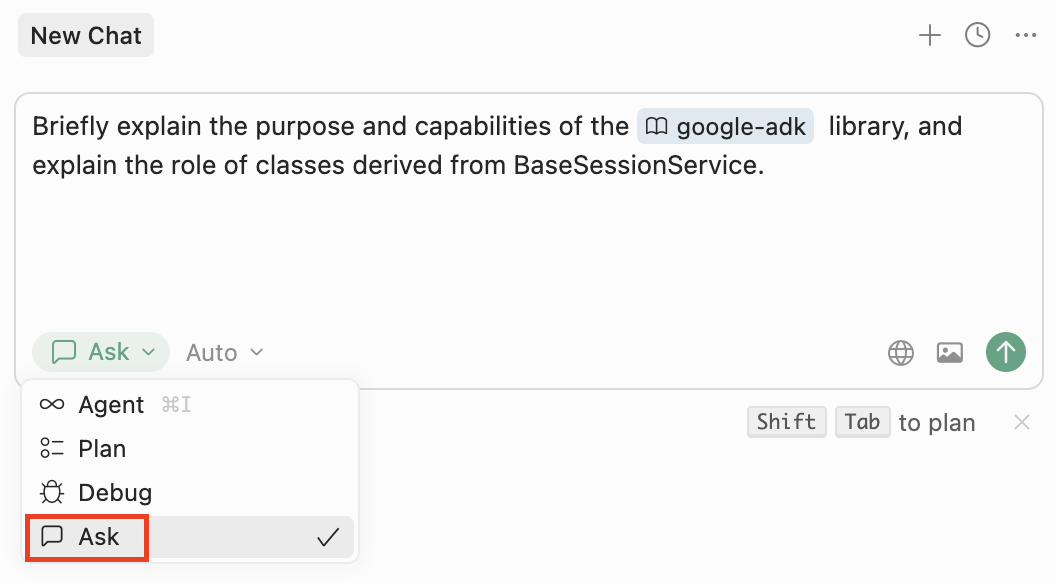
Let’s open a dialog with the agent and ask our first question about Google ADK:
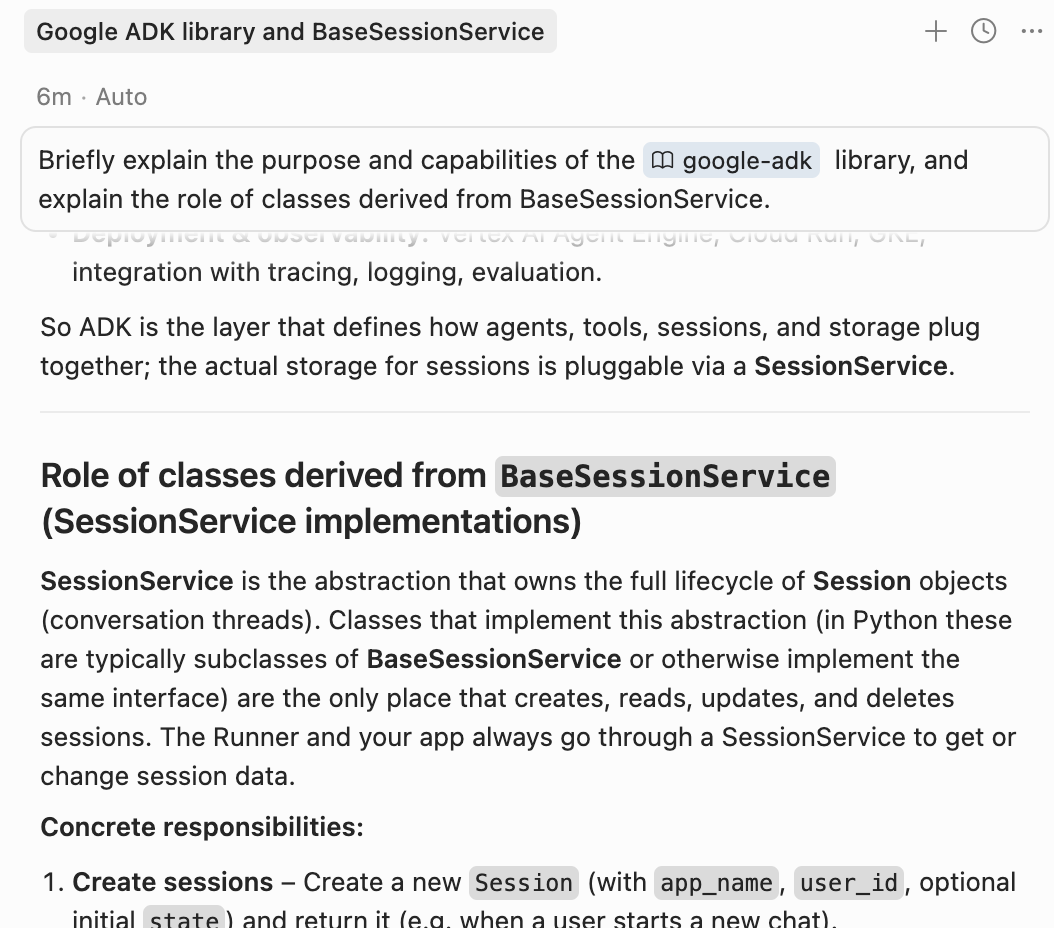
Briefly explain the purpose and capabilities of the @google-adk library, and explain the role of classes derived from BaseSessionService..
Make sure that your dialog with the agent is in Ask mode:
In response, you’ll get the overview we asked for:
Now go ahead and ask any other questions you need in order to fully understand how this task should be implemented.
There are no “rules” for how you should conduct the technical investigation. This is one of the areas where you should apply your expertise and gather all the relevant information you need. For example, you may want to add additional docs to Cursor (in our case - docs for the MongoDB driver), read some code yourself, consult with colleagues and product owners, etc.
These are the questions you may want to ask for this specific task, given that we’re using the existing DatabaseSessionService implementation as an example:
Give me a high-level overview of how DatabaseSessionService is implementedList all the tables where DatabaseSessionService stores session data for schema v1. For each table, list the primary keys (PKs), then explain how the tables are connected to each other (FKs?).What concurrency considerations are taken into account in the @google-adk DatabaseSessionService implementation? Does it use any synchronization primitives when writing concurrently to the same tables from within the same process?- etc
The entire dialog with the agent can be found in this PDF file.
3.3. Writing a Technical Spec for a Coding Agent
OK, now you’ve gathered all the information you need, made all the required decisions, and already know what the final result should look like. Half of the work is done.
Now you need to consolidate your knowledge and decisions into a final technical specification. This is not just a prompt, but a real, detailed specification, where you should clearly outline the goal of the agent, reference all relevant documentation and code, clearly set boundaries and limitations, emphasize the most critical requirements, and so on.
It is highly recommended to write it in a structured Markdown format with clear separation into sections using headers.
Below you can find an example of such a technical specification:
@mongo_session_service.py

# Introduction
Your goal is to implement `MongoSessionService`. This is an extension of `BaseSessionService` from @google-adk that should use MongoDB as a storage and utilize @pymongo for working with the database.

# Requirements
## 1. Data Storage
### 1.1. Collections

The list of collections is based on `google.adk.sessions.session.schemas.v1` from google-adk. You should not utilize classes from `v1.py` (`StorageEvent`, `StorageAppState`, etc.), but rather use them as examples for the classes that you define.

The following collections should be used:
- `sessions` (`StorageSession`)
- `events` (`StorageEvent`)
- `app_states` (`StorageAppState`)
- `user_states` (`StorageUserState`)
- `adk_internal_metadata` (`StorageMetadata`)

For each collection, you should define a separate class that will be used as a DAL model. Each field that we store in the collection should be defined in the corresponding model.

### 1.2. Document IDs
Definitions in `google.adk.sessions.session.schemas.v1` define composite primary keys that are not applicable for Mongo. You also must **not** use Mongo’s `ObjectId` as a key.

Instead, each document in a Mongo collection should have a deterministically constructed `_id` field, composed from the fields marked as PK in `google.adk.sessions.session.schemas.v1`.

You should check pymongo to decide whether such a custom `_id` field should be included in the model class, or whether `_id` should be constructed dynamically for each query. In any case, the rule of `_id` composition for each collection should be deterministic and clearly defined.

#### Example
For storing user states, google-adk defines the class `StorageUserState` in `google.adk.sessions.session.schemas.v1`. In this class, fields `app_name` and `user_id` are marked as PK. So for this model, the `_id` of the Mongo document should be defined as `f'{app_name}_{user_id}'`.

### 1.3. Work with pymongo
You should use pymongo as a DB driver. Use `AsyncMongoClient`, because all methods you need to override from `BaseSessionService` are async. Check pymongo docs to decide how to handle the client in the most effective way (e.g., whether you should create a new client for each query or instantiate it once in the constructor, etc.).

## 2. "Business" rules
Refer to google-adk docs and an existing implementation of `BaseSessionService` (e.g., `DatabaseSessionService`) to learn how all collections listed in section 1.1 are connected to each other, and when and how each of them should be saved / updated / deleted.

## 3. Additional requirements
- Check the existing implementation of `BaseSessionService` from google-adk to learn which helper methods should be reused in your implementation. For example, `_trim_temp_delta_state` from `BaseSessionService`.
- Classes for all DAL models should be placed in a separate file in root directory.
- Do not introduce any dependencies in addition to existing `google-adk` and `pymongo`.
- Do **not** support any google-adk storage schema other than `google.adk.sessions.session.schemas.v1`. Do **not** support schema migrations. Keep it simple. Use `google.adk.sessions.session.schemas.v1` only as a reference for creating DAL classes.
- The signature of the constructor of `MongoSessionService` should remain `def __init__(self, conn_string: str, db_name: str):`. Collection names should not be configurable.
- Do **not** create any unit or integration tests, usage examples, etc. The only changes that should be made are: implementing the class in `mongo_session_service.py` and the DAL models in `models.py`.
A few notes:
- For this technical spec, I added the PyMongo client documentation (
@pymongo) to Cursor and added this package to the project. - The first row (
@mongo_session_service.py) of the spec is a reference to the file where the resulting class should be implemented. - It’s a good idea to provide examples as I did (see
#### Example). - If you’re not sure about some minor technical decisions (or you didn’t have time to investigate a specific aspect), you can directly instruct the agent to check the documentation and make a decision as recommended by the library vendor. Concrete example from this tech spec:
Check pymongo docs to decide how to handle the client in the most effective way (e.g., whether you should create a new client for each query or instantiate it once in the constructor, etc.) - The last row of the specification (
Do **not** create any unit or integration tests...) is added for the sake of simplicity. But you may want to leave it as is and create a separate technical spec for testing infrastructure.
3.4. Building an Implementation Plan: Making Sure That the Agent Understood You Correctly
The hardest part is behind us!
Now we need to provide the coding agent with this technical spec and make sure it understood it correctly. To do this, create a new chat with the agent, select Plan mode, and paste our technical spec there (if you didn’t write it in the chat from the beginning):
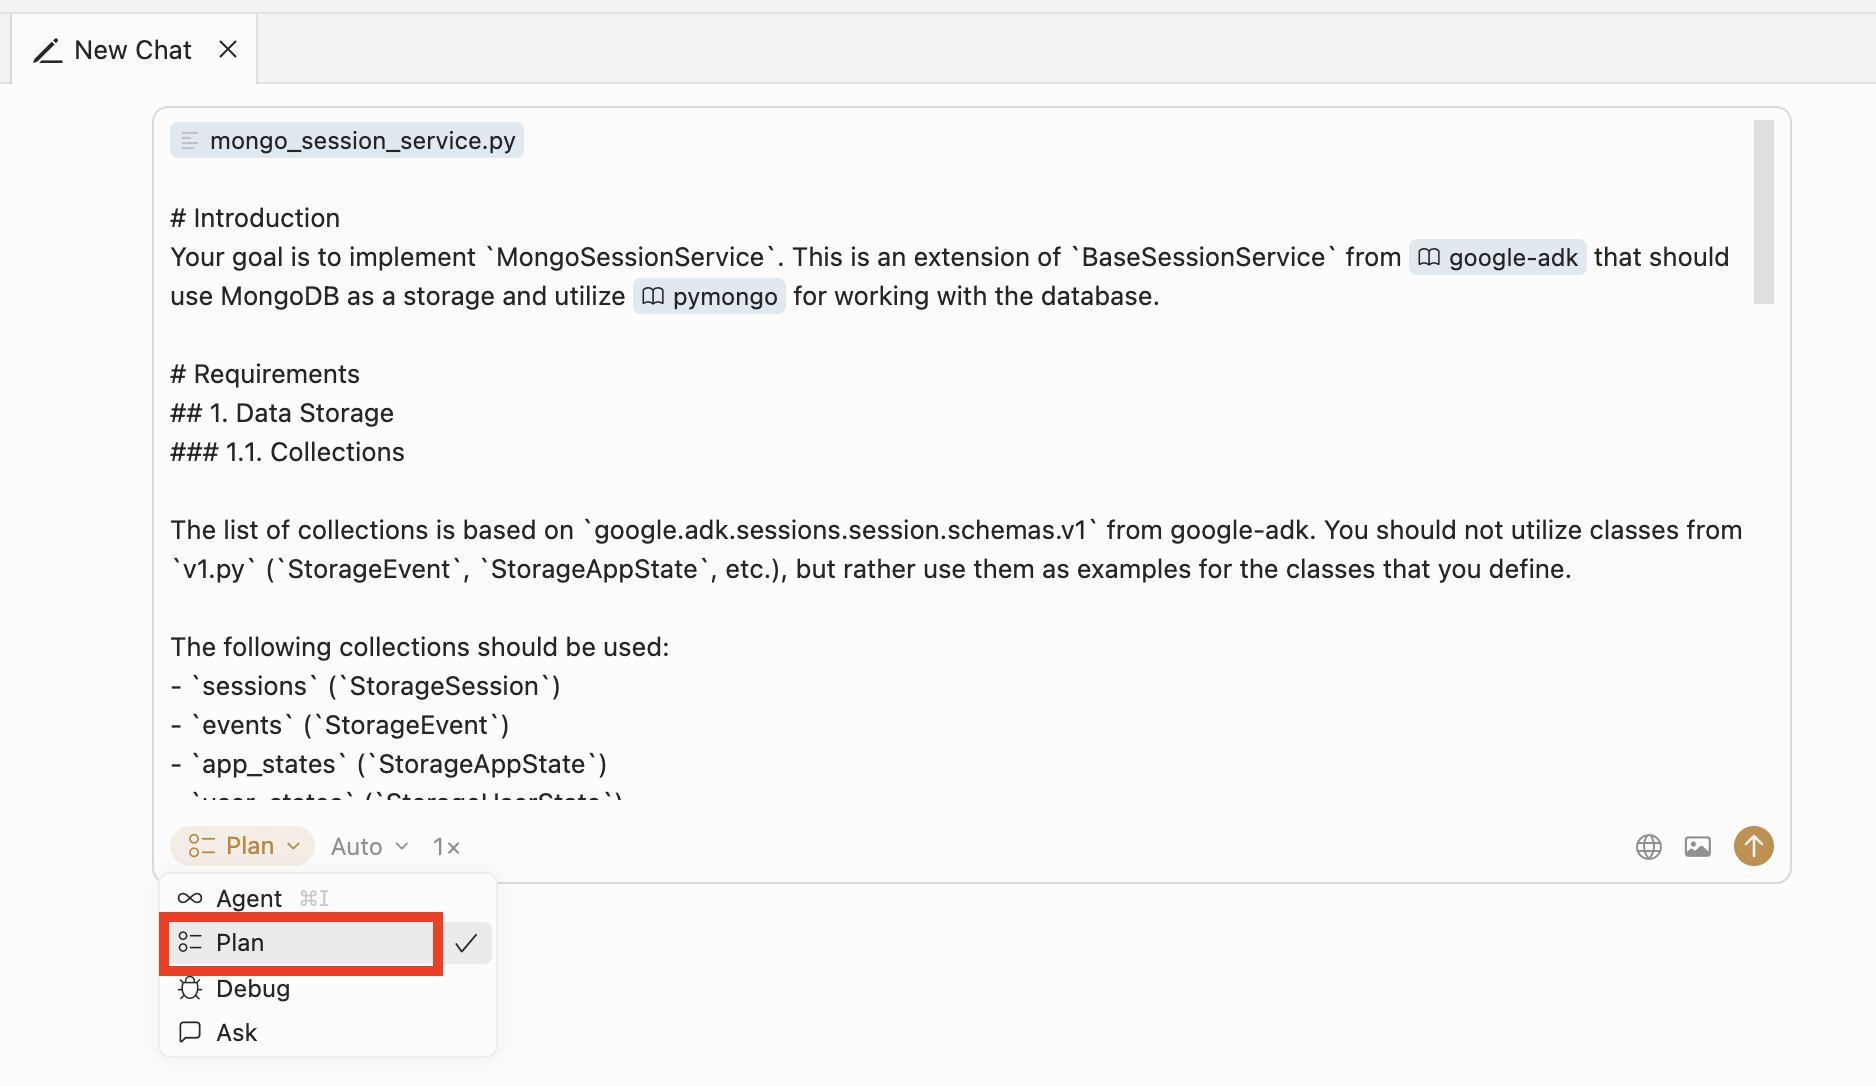
It’s critically important to select
Planmode in Cursor rather thanAgentmode. InAgentmode, the agent will try to immediately implement your task as best as it understood it, while inPlanmode it will first create a detailed implementation plan that you can validate, request changes to if needed, and only then execute.
The resulting execution plan will look like this:
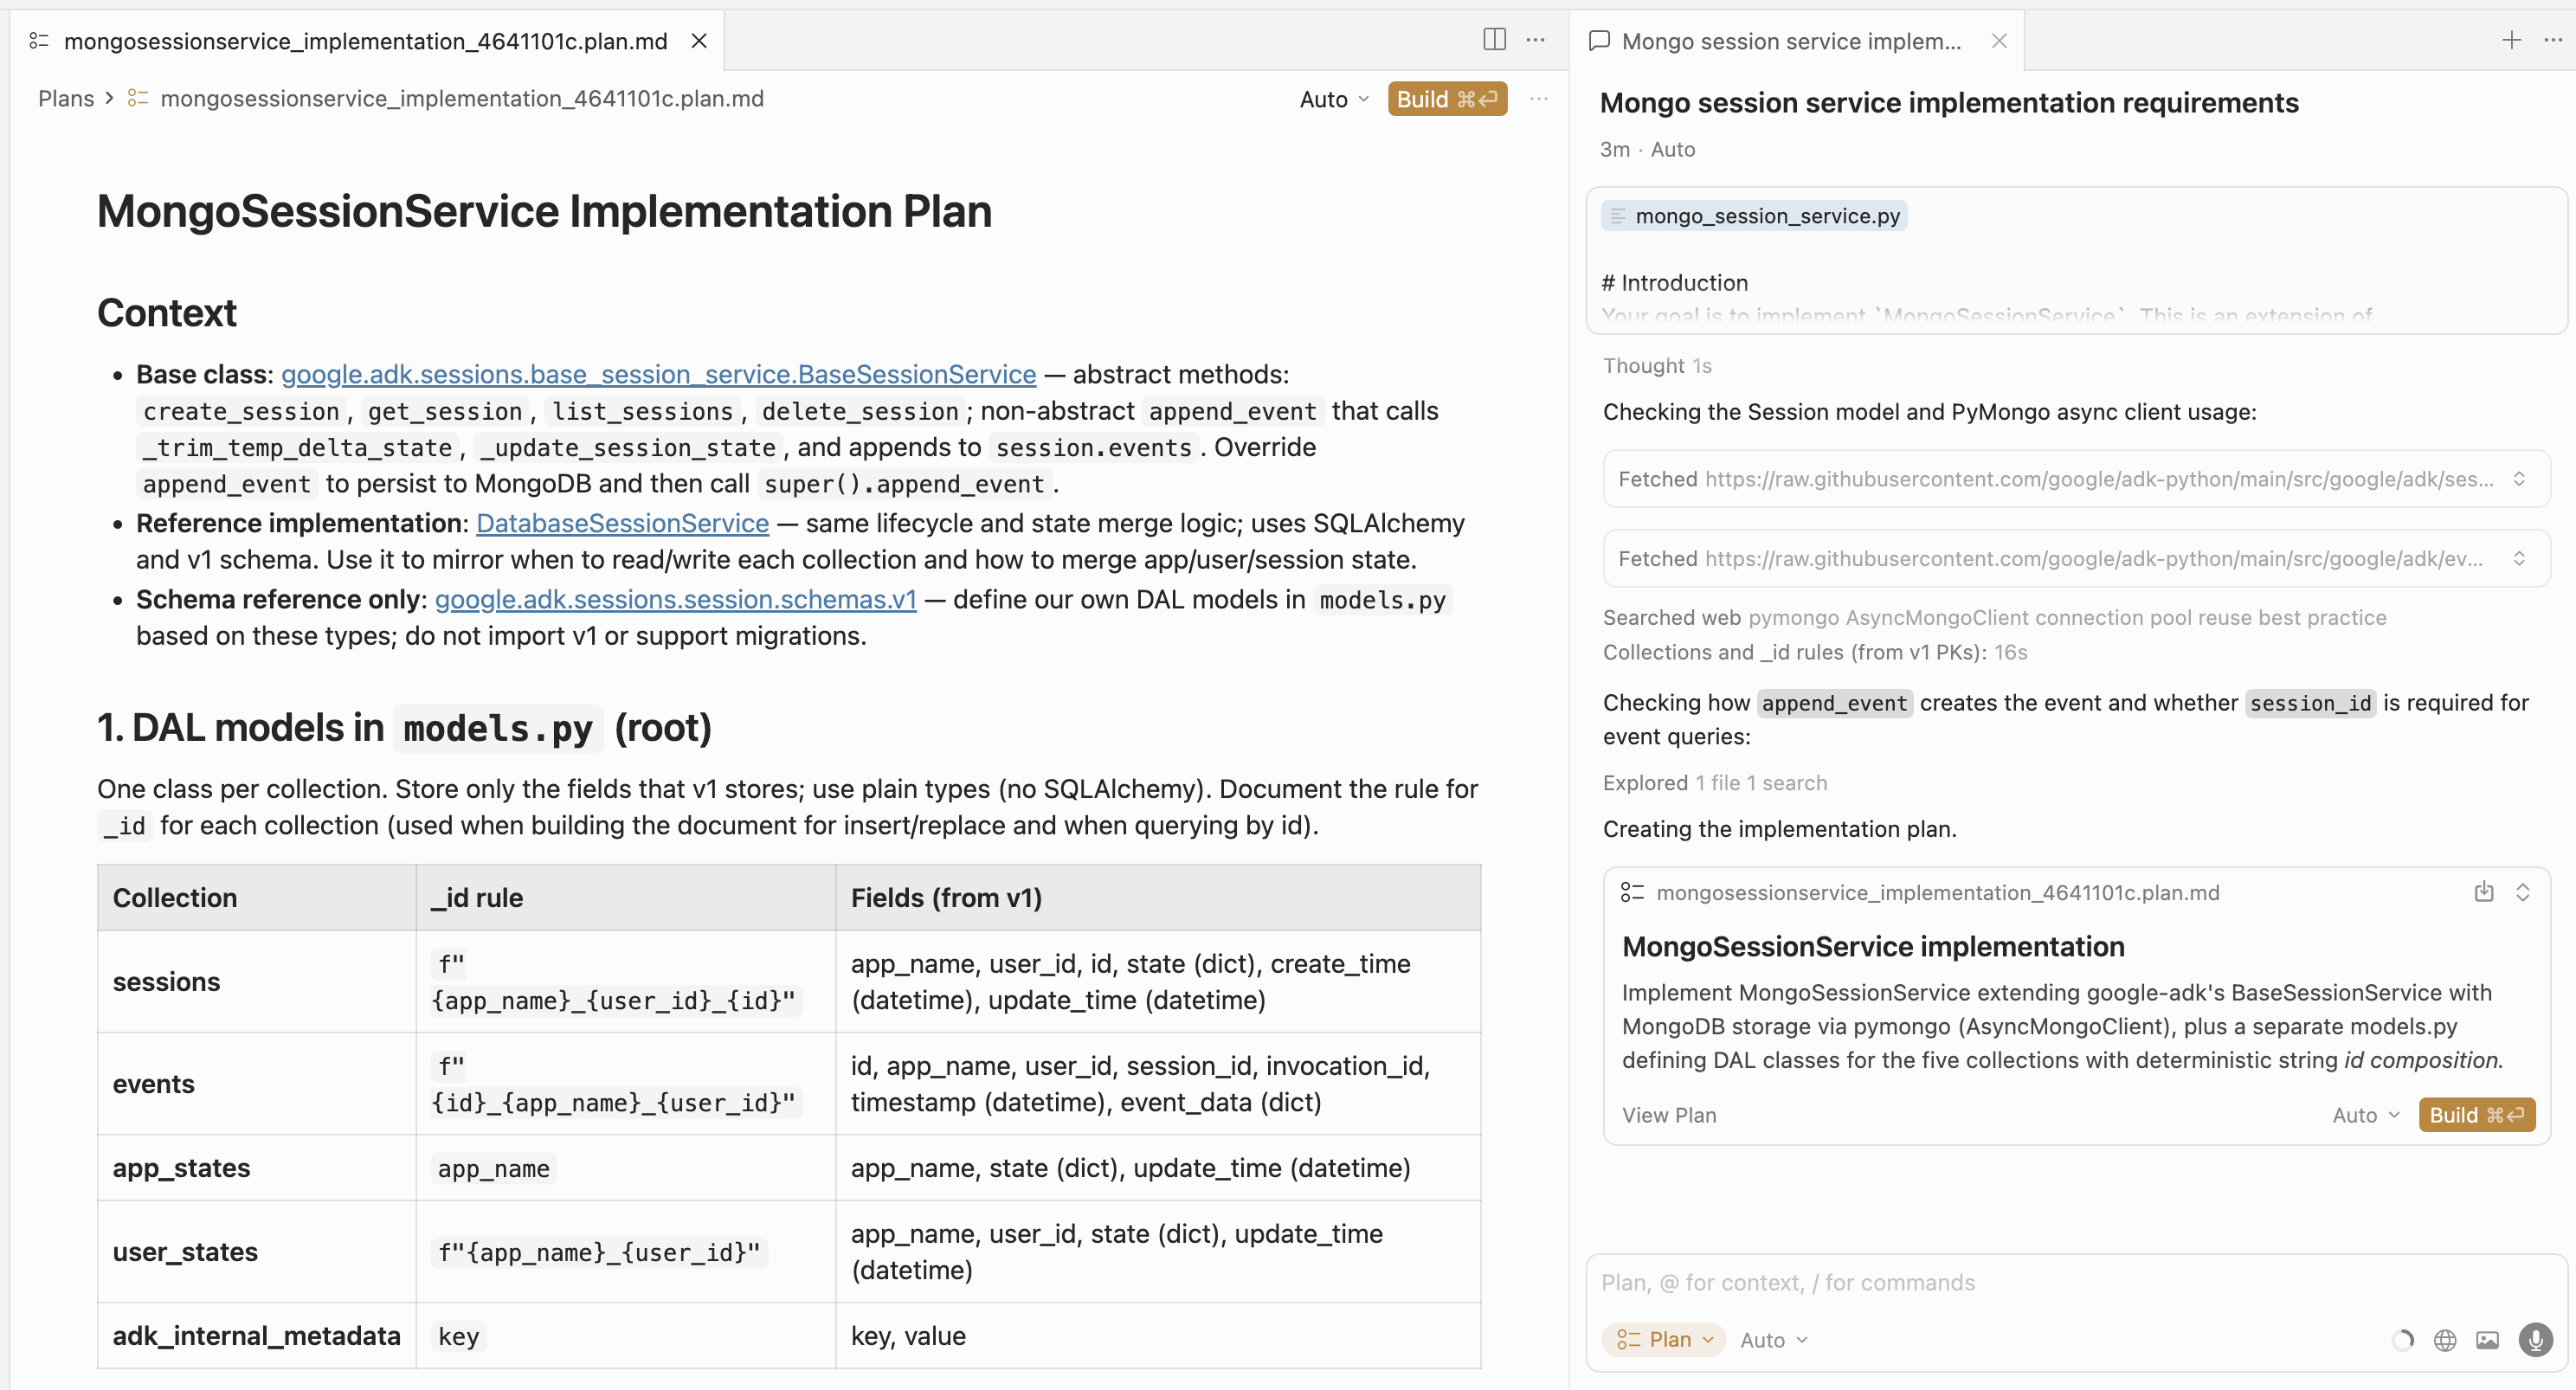
Now the most crucial part: actually read and validate the plan. Use the knowledge about the task that you’ve gained during technical investigation. This is the ultimate blueprint the agent will use to implement the code, and it’s your responsibility as the AI coding agent operator to make sure the plan is correct.
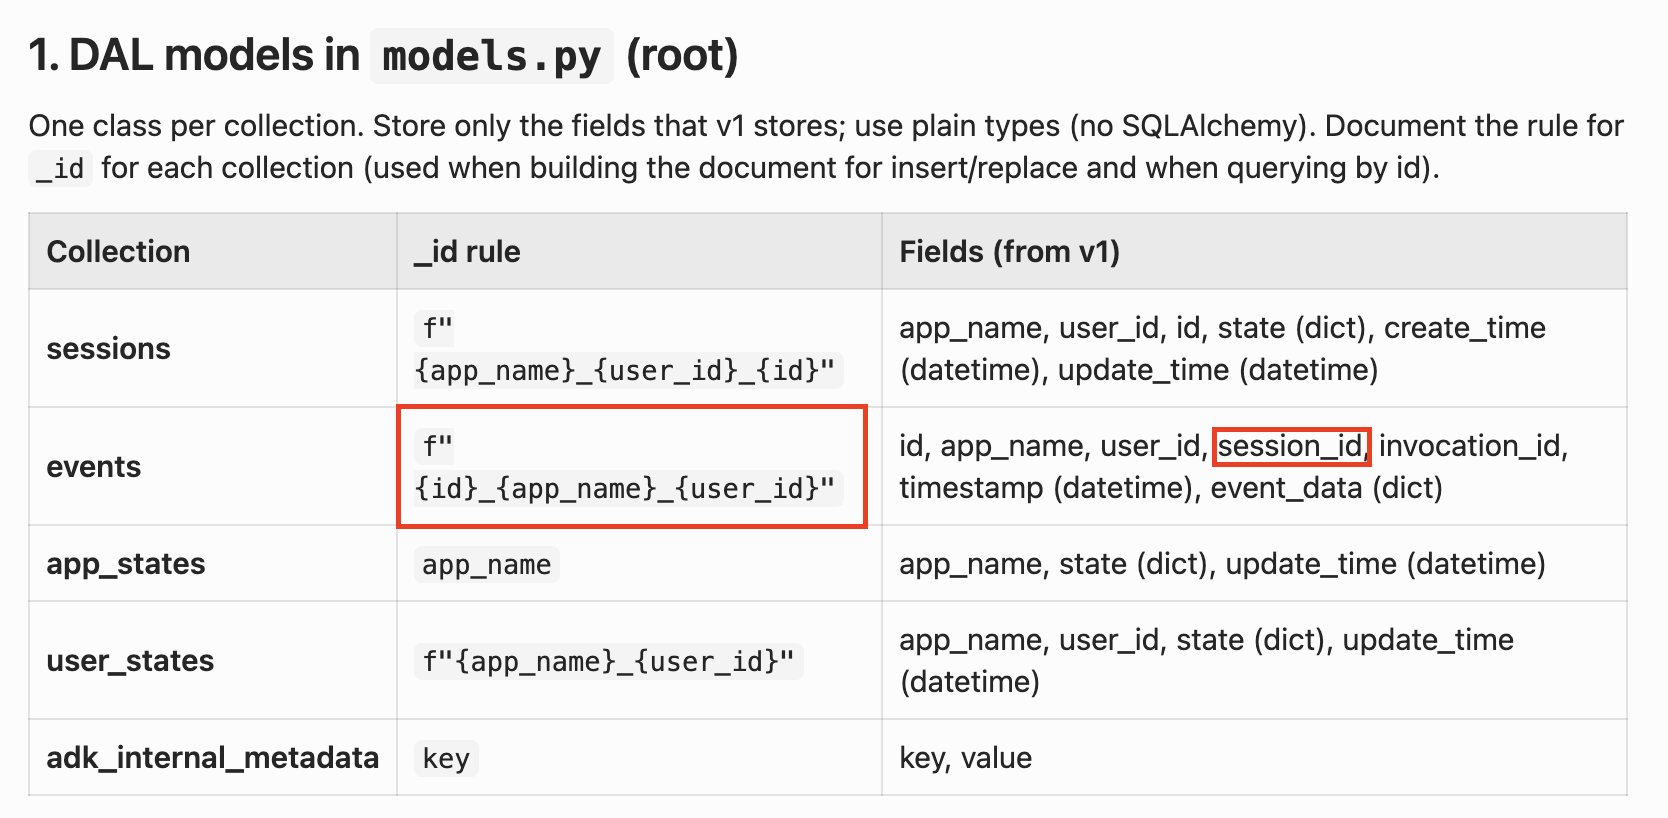
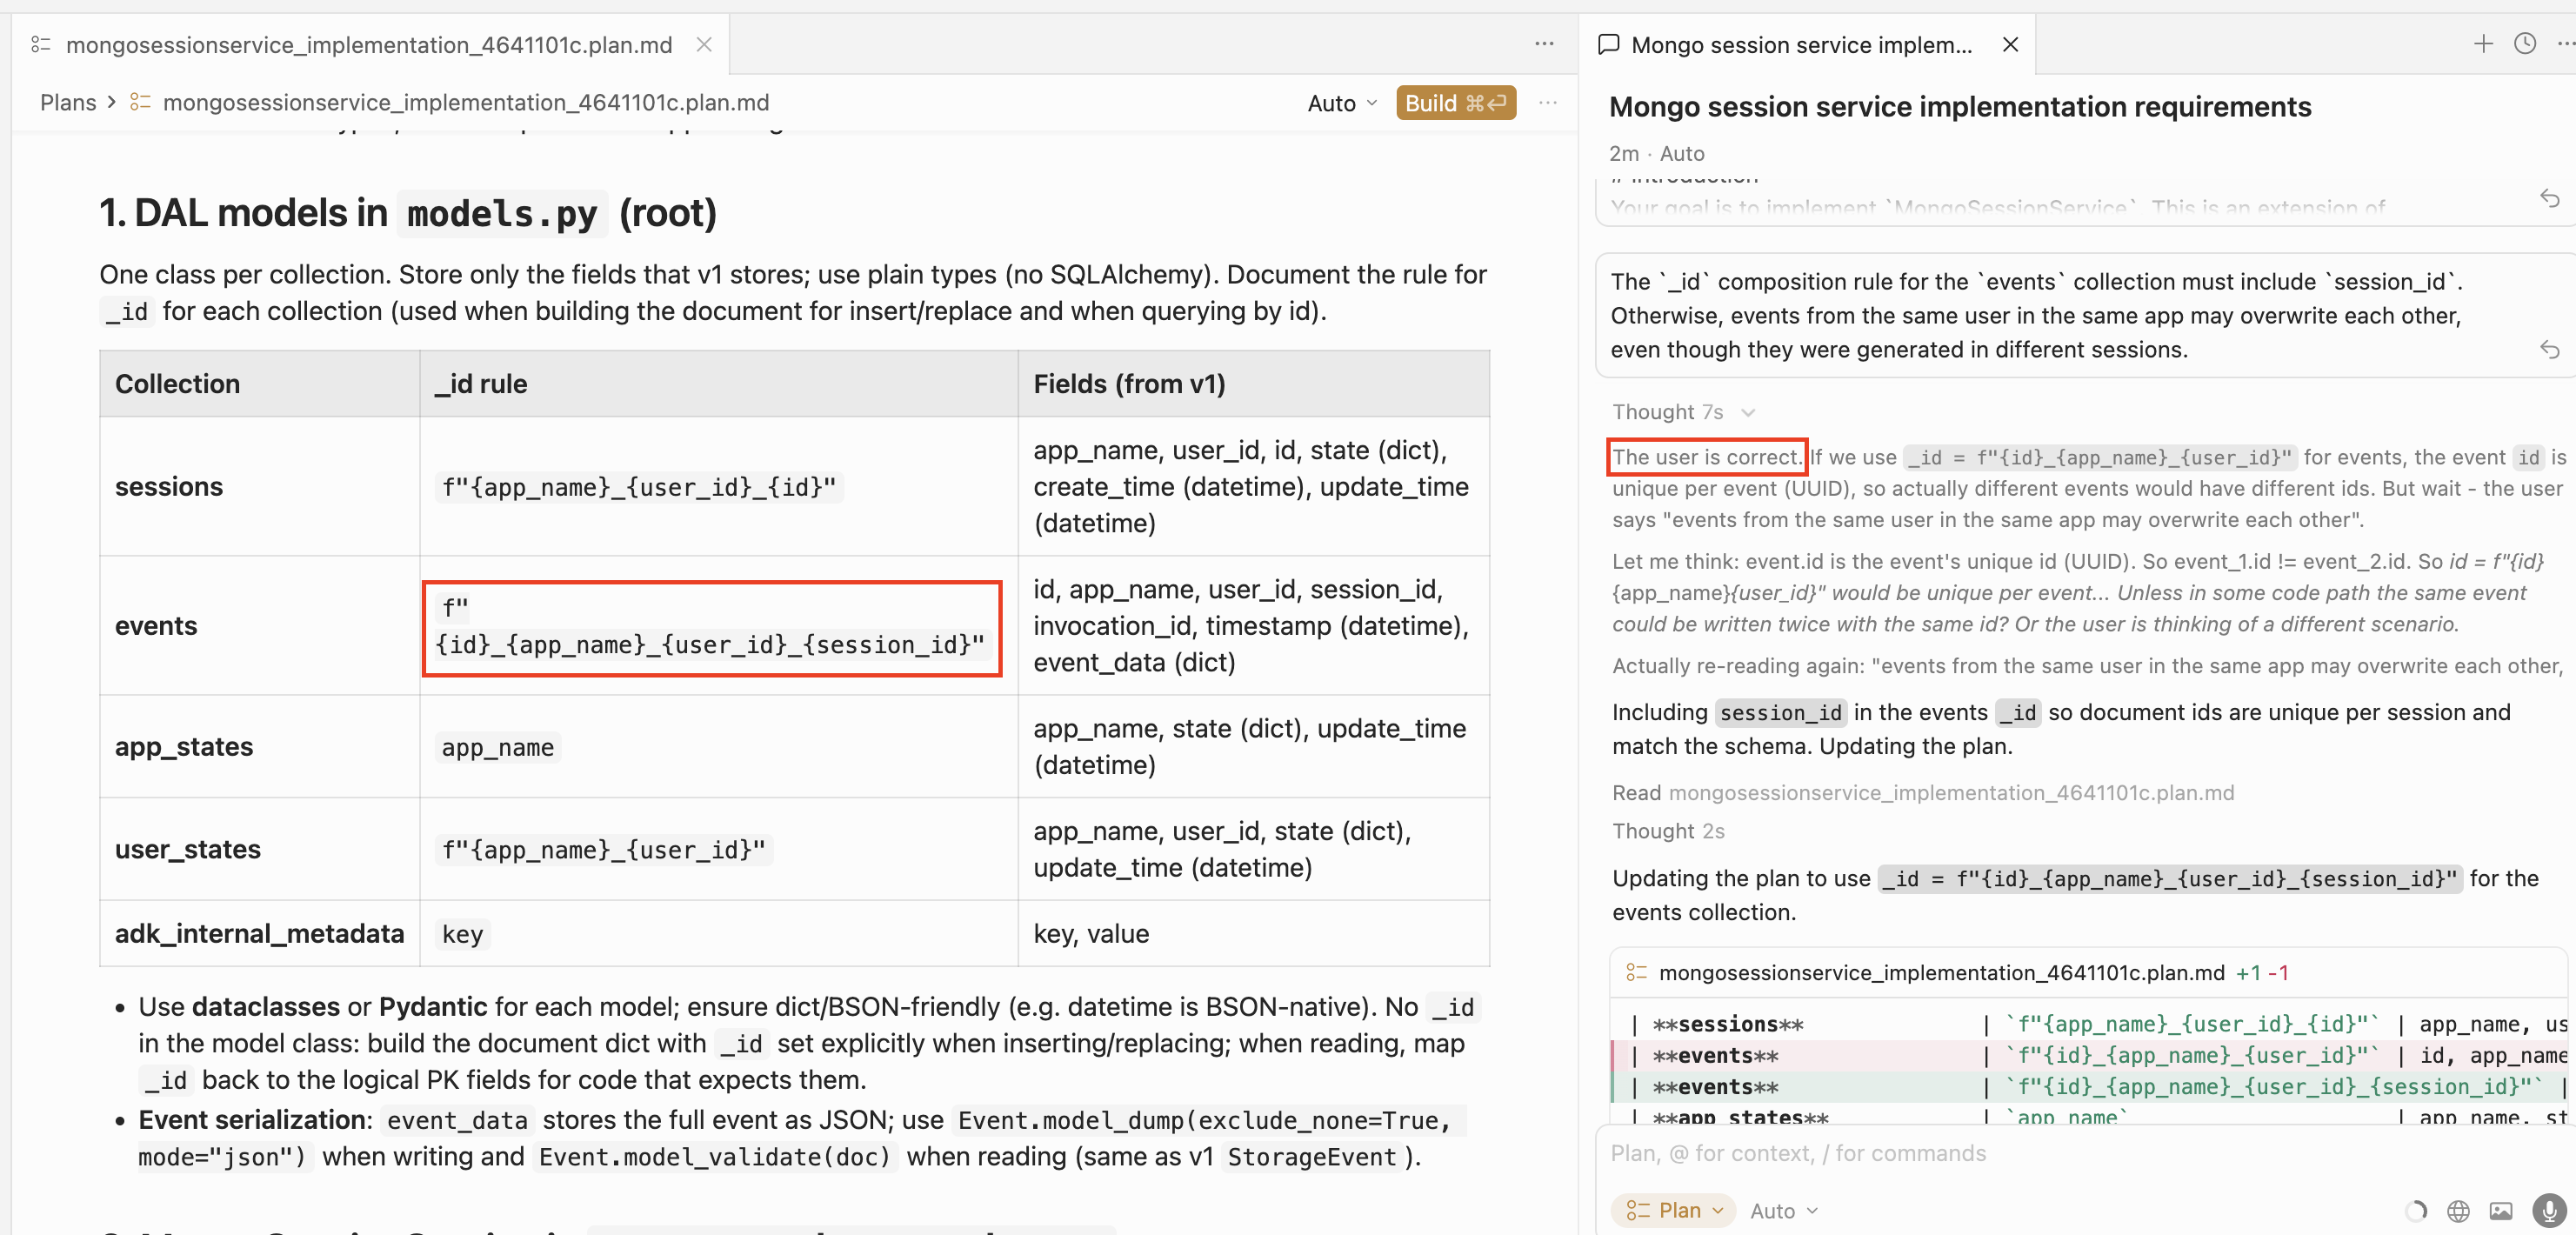
For example, in the plan that was generated for our task, we can easily spot an error: the _id composition rule for the events collection is incorrect. It should include session_id, but in the proposed plan this field is not used for event identification:
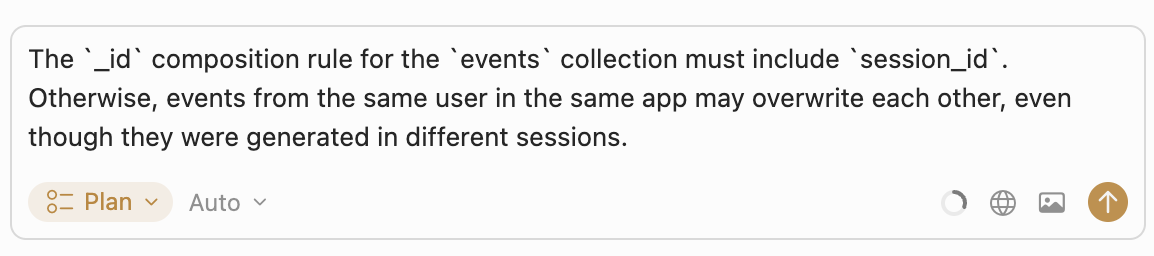
Let’s ask the agent to fix this in the same chat where we requested the plan creation:
The agent recognizes its mistake and fixes the plan accordingly:
3.5. Plan Execution
Once the plan is validated, you can press Build and go grab some coffee :) The implementation will take some time. Along the way, the agent may ask for permission to run some scripts.
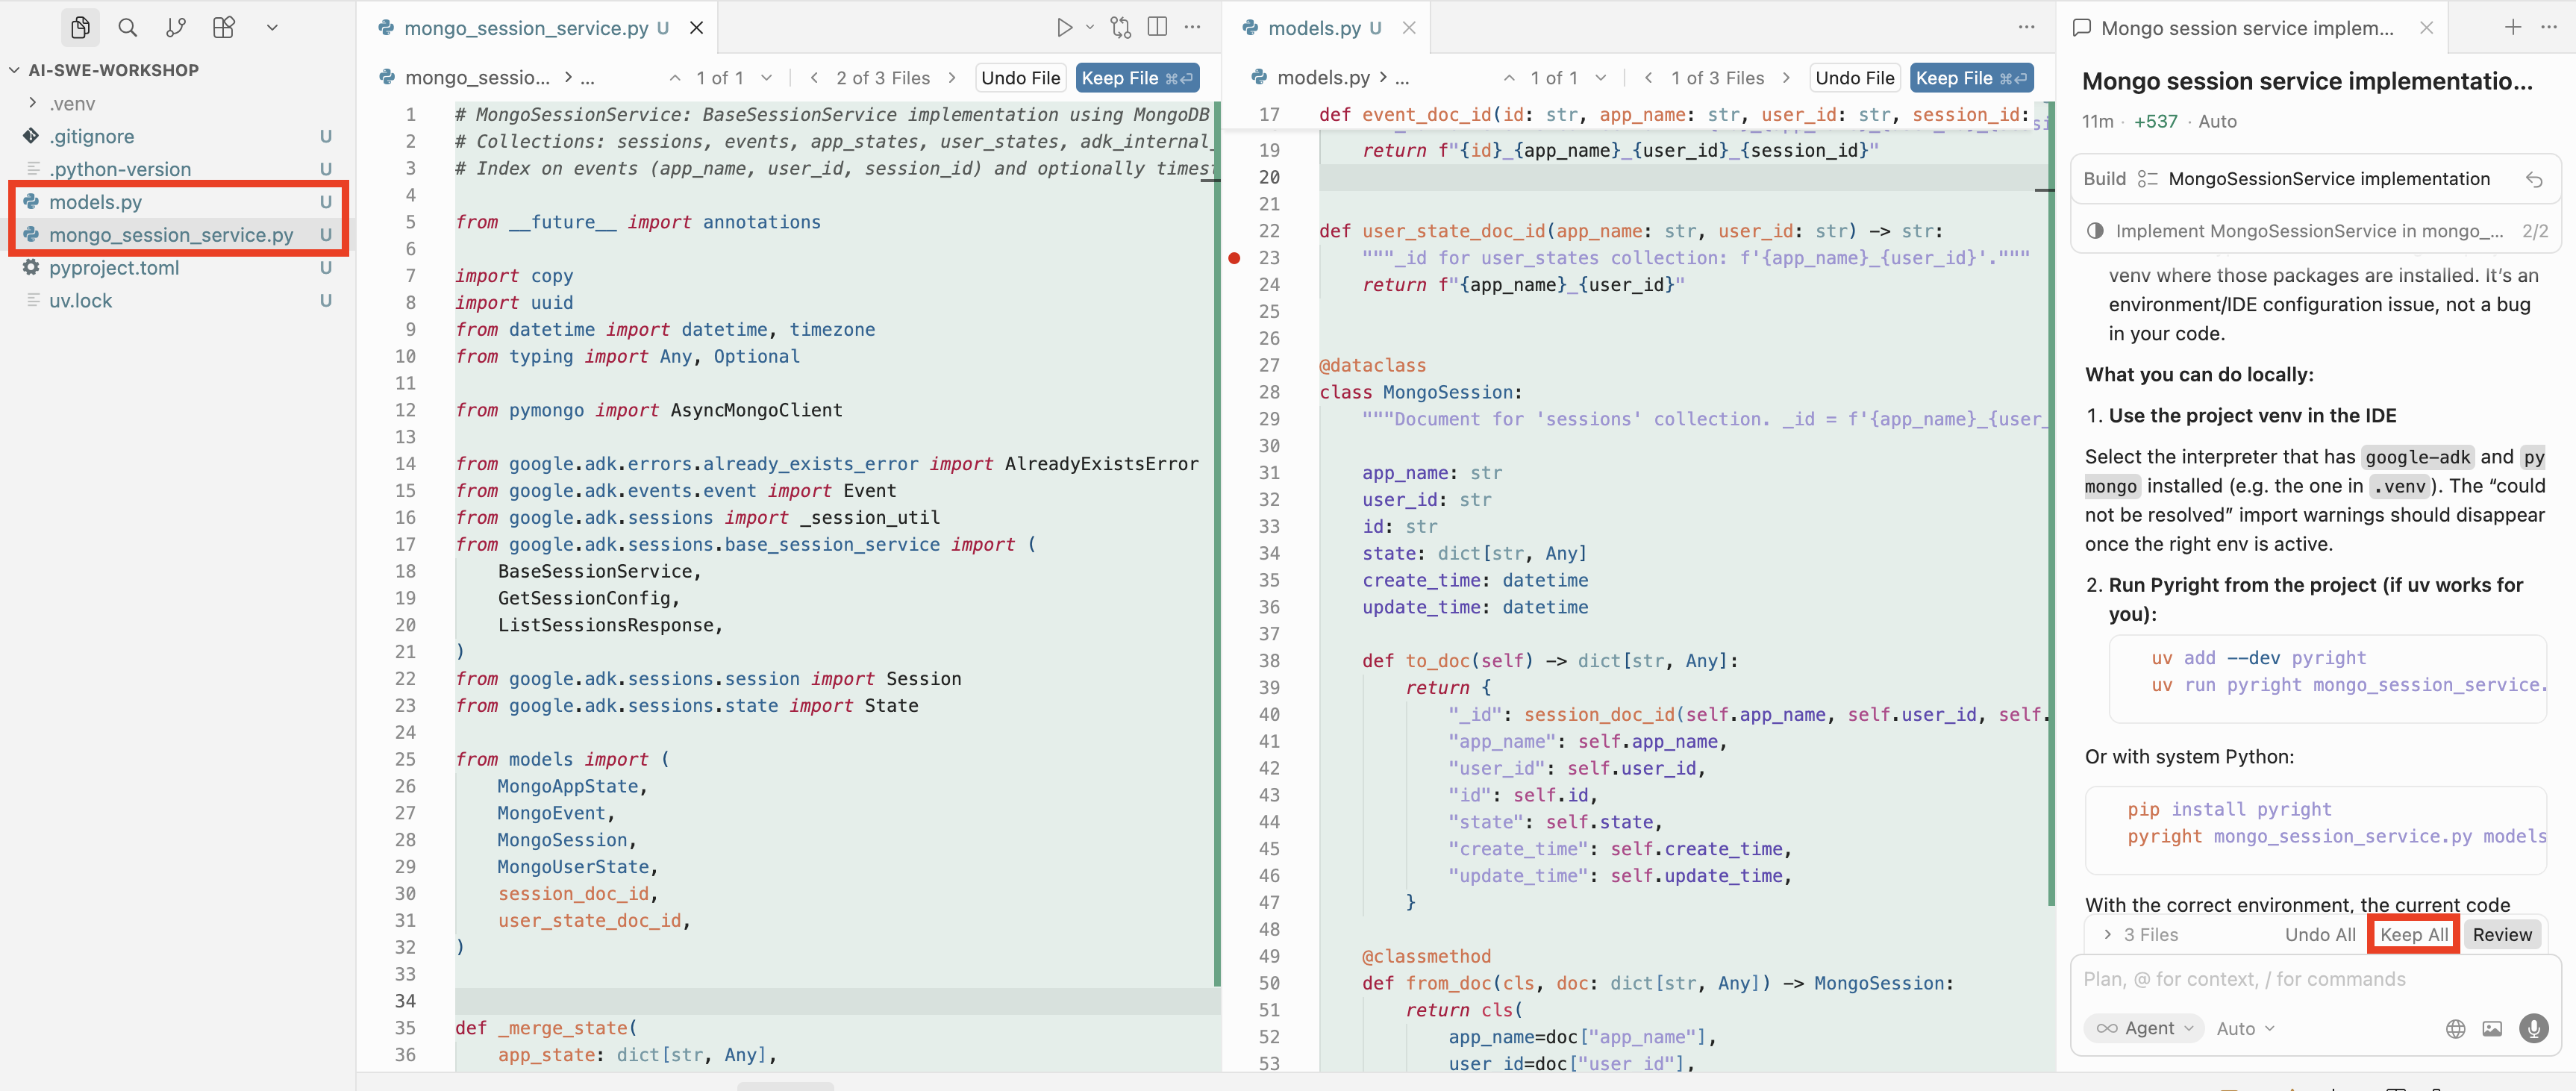
At the end of the process, you will have all the code ready. You’ll need to review it and (if everything is fine) accept the changes by pressing Keep All:
4. Conclusion
Of course, this is not the end of the story. In real enterprise-grade development, you’ll need to write unit/integration tests and maybe even validate the resulting code using another coding agent. It’s a debatable question whether tests should be allowed to be written by an agent or should remain a human-only responsibility.
Also, in really big projects you’ll face much more complex tasks than just implementing an interface. In such cases, it’s good practice to decompose development into subtasks and implement each of them by repeating the “Investigation → Specification → Plan Validation → Plan Execution” cycle. Decomposing large projects into such subtasks is also an area where you, as a human expert, are an essential part of the process.
Anyway, I hope this article was helpful and that you now feel ready to team up with AI to boost your productivity.